
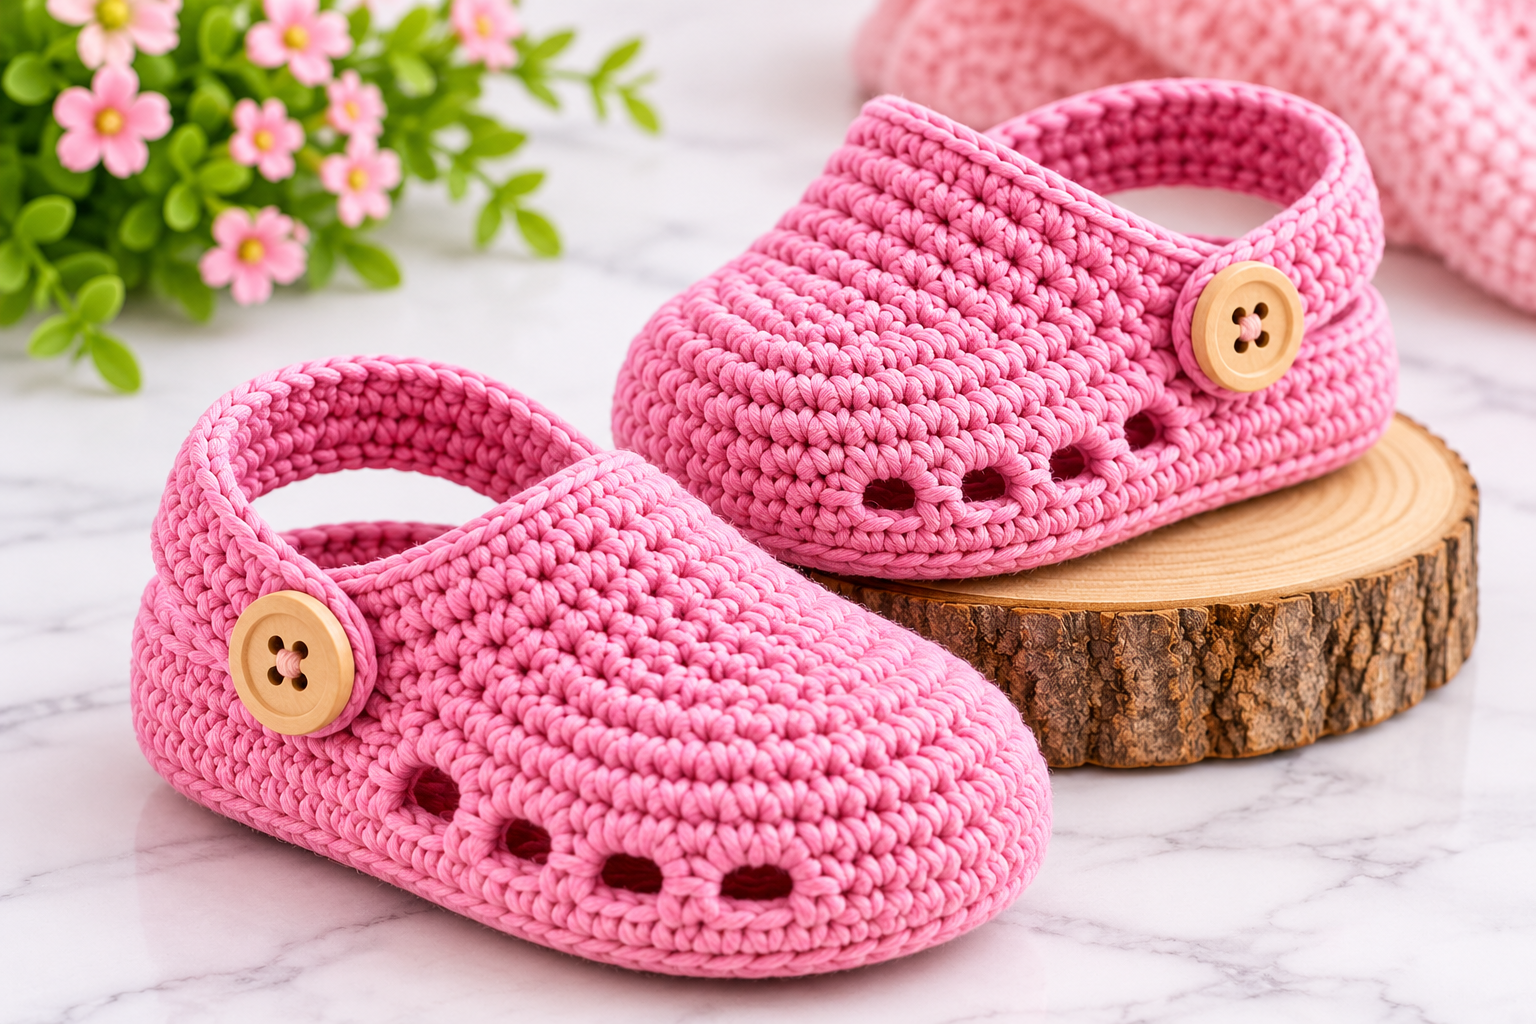
These little clogs are soft, round and sage green, with side holes, a heel strap and a wooden button. They look like the tiny garden shoes you see in shops, but you can make them at home with one ball of cotton yarn and a few quiet evenings.
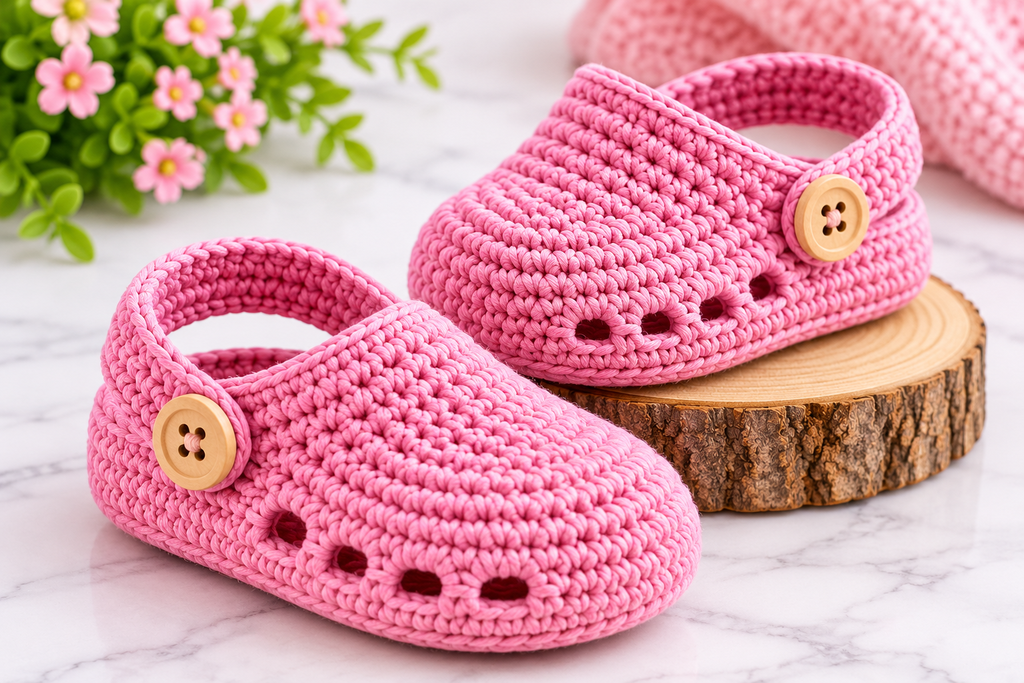
We designed this pattern for people who are new to shaping. You will work a flat sole, build the walls straight up from it, and finish with a few short rows and a strap. If you can already make a single crochet stitch and an increase, you have everything you need. Every round is written out with its stitch count, so you can check yourself as you go.
Finished size: sole about 9 cm (3.5 in) long, which suits roughly 3 to 6 months. Gauge varies, so see “Make It Your Own” for other sizes.
Skill level: Advanced beginner (you will work in the round, in rows, and sew on a strap)
Time: about 2 to 3 hours for a pair
Materials
- DK or light worsted cotton yarn in sage green, about 30 g (roughly 65 m / 70 yd) for the pair
- 3 mm crochet hook
- 2 wooden buttons, about 15 to 18 mm
- A stitch marker (a scrap of contrasting yarn works well)
- Yarn needle for weaving in ends and sewing
- Scissors
If you are still choosing yarn, our guide to Best Yarn for Amigurumi explains why smooth cotton gives such crisp stitches. Cotton is also washable, which matters for baby things.
Safety note: Buttons can be a choking hazard. For babies and young children, skip the buttons and embroider a small circle in a matching colour, or use the crochet circle described in “Finishing Touches”. Also keep these shoes for dress-up and short wear, since they are not made to stay on a crawling baby.
Abbreviations (US terms)
- ch: chain
- sc: single crochet
- inc: increase, which means 2 sc in the same stitch
- sl st: slip stitch
- st / sts: stitch / stitches
- BLO: back loop only. Each stitch looks like a “V” on top, and you work into only the back (far) leg of the V. This leaves a neat ridge behind.
- Rnd: round
- ( ) x 3: repeat what is inside the brackets 3 times
New to reading patterns? Our guide on How to Read an Amigurumi Pattern walks through the shorthand, and Single Crochet, Increases and Decreases covers the stitches we use here.
Before You Start
- Work in a spiral. For the sole and walls, do not join the rounds and do not turn. Mark the first stitch of each round with your marker and move it up as you go.
- Count at the end of every round. The number in brackets is how many stitches you should have. If your count is off, fix it now. It is much harder later.
- The sole is read from the heel. Each sole round starts at the heel, then runs along one side, around the toe, and back along the other side. We call the long straight parts the “sides”.
- Keep the sole flat. If it ruffles like a frill, you have too many stitches. If it cups like a bowl, you are missing some.
- Pin before you sew. Pin the strap in place on both shoes and compare them before you stitch.
The Pattern
Make 2 shoes, each with a sole, walls, side rows and a strap.
Sole and Walls (make 2, sage green)
Start with a slip knot, then chain 11. We have named the parts of each round so you always know where you are: heel, first side, toe, second side.
Sole
- Rnd 1: Sc in the 2nd ch from your hook (that is the heel stitch), then work 1 more sc in the same ch. Sc in each of the next 8 ch. Work 3 sc in the last ch (the toe). Turn your work to the other side of the chain. Sc in the free loops of the next 8 ch (21)
- Rnd 2: inc x 2 (heel), sc in next 8, inc x 3 (toe), sc in next 8 (26)
- Rnd 3: (sc, inc) x 2, sc in next 8, (sc, inc) x 3, sc in next 8 (31)
- Rnd 4: (sc, inc) x 3, sc in next 8, (2 sc, inc) x 3, sc in next 8 (37)
- Rnd 5: (2 sc, inc) x 3, sc in next 8, (3 sc, inc) x 3, sc in next 8 (43)
- Rnd 6: (3 sc, inc) x 3, sc in next 8, (4 sc, inc) x 3, sc in next 8 (49)
The sole should now measure about 9 cm (3.5 in) long and lie flat. If yours is much smaller or bigger, try a different hook size on the next shoe.
Tip: After Rnd 6 you have 15 heel stitches, 8 sts on each side, and 18 toe stitches. Keep those numbers in mind, because the holes and rows use them.
Walls
- Rnd 7: Sc in the back loop only of each st around (49). This makes a little ridge where the sole meets the wall.
- Rnd 8 (holes): Sc in each of the next 15 sts (the heel). Then sc in the next st, (ch 2, skip the next 2 sts, sc in the next st) x 3. This makes 3 holes on the first side. Sc in each of the next 14 sts (the toe). Then sc in the next st, (ch 2, skip the next 2 sts, sc in the next st) x 3, which makes 3 holes on the second side (49)
- Rnd 9: Sc in each st and in each ch around (49)
- Rnd 10: Sc in each st around (49)
After Rnd 8 you will have 12 chains and 37 sc. Rnd 9 turns those 49 into a solid round again, with a hole under each chain.
Heel edge and front rows
We now leave the heel low and build the sides and toe higher, like a clog.
- Heel edge: Sl st in each of the next 15 sts (the heel). Do not turn.
- Row 11: Ch 1 (this does not count as a st), sc in each of the next 34 sts. Ch 1, turn (34)
- Row 12: Sc in each st across. Ch 1, turn (34)
- Row 13: Sc in each st across (34)
Fasten off and weave in the end. Look at your shoe from the side: the heel is lower and the front rises higher. That is exactly the clog shape.
A note on the design: We cannot see the inside of the clogs in the reference photo, so the shape of the sole and the way the walls rise are our own beginner-friendly design choice.
Heel Strap (make 2, sage green)
- Ch 27.
- Row 1: Sc in the 2nd ch from the hook and in each ch across (26)
- Row 2: Ch 1, turn, sc in each st across (26)
- Row 3: Ch 1, turn, sc in each st across (26)
Fasten off, leaving a long tail at each end for sewing. The strap is about 12 cm (4.5 in) long, which is longer than the distance around the heel. That extra length makes it arch up gently behind the heel, like the photo.
Putting It Together
- Lay a shoe on the table with the toe pointing away from you. Find the two vertical edges where the high front rows meet the low heel, one on each side.
- Pin one end of a strap flat against the outside of the shoe, with its end just behind that vertical edge. It should sit across the top 3 rows of the wall.
- Pin the other end of the strap in the same place on the other side. Let the strap arch up behind the heel.
- Check that both sides match. Hold the shoe up and look from the back.
- Sew each end firmly with the long tails, going through the strap and the wall several times. Tie off inside the shoe and weave in the ends.
- Repeat on the second shoe and compare the two before moving on.
New to sewing pieces on? Our Free Teddy Bear Pattern has a gentle first lesson in pinning and stitching crochet.
Finishing Touches
- Buttons: Sew one button over each strap end, on the outside of the shoe, through the strap and the wall. Stitch back and forth at least 8 times so it is very secure, then knot inside the shoe.
- No-button option: Make a small circle: 6 sc in a magic ring (see How to Make a Magic Ring), then pull tight and fasten off. Sew it where the button would go.
- Check the holes: Open each of the six holes with the tip of your hook so they sit nicely round.
- Final look: Press the shoes gently into shape with your hands. Cotton holds its form well.
Make It Your Own
- A different colour: Pick soft pink, butter yellow or oatmeal, and match the button to the yarn.
- Contrast strap: Make the strap in a different colour for a playful look.
- Bigger size: Start with a chain 2 longer and add 2 more sc on each side in every round, so each round’s total goes up by 4. Add 1 extra row at the front for a taller shoe.
- Fewer holes: Work only 2 holes per side by adding extra sc at the start of each block.
Common Problems (and Quick Fixes)
- The sole ruffles. You probably added an increase too many. Count after every round and pull back to the last correct round.
- The sole curves up like a boat. You may have missed an increase at the toe or heel. Count each section: heel, sides, toe.
- The holes are different sizes. Check that you skip exactly 2 sts and chain exactly 2 each time. Stitch tension also matters, so keep your yarn a little looser at the chains.
- The front rows pull in at the sides. Make sure you work your first sc of each row into the very first st, and count 34 at the end.
- The strap stands too stiff or too floppy. Add a fourth row for a firmer strap, or leave it as is for a softer arch.
For more help, see our post on 10 Beginner Amigurumi Mistakes.
FAQ
What yarn works best?
Smooth DK cotton makes firm, neat stitches and washes well.
Can I use a different hook size?
Yes. A smaller hook makes a smaller, stiffer shoe, and a bigger hook makes a looser, larger one. Check your sole length after Rnd 6.
Do I need a stitch marker?
It helps, because you work in a spiral and can easily lose your place. A scrap of yarn does the job.
Are the buttons safe for babies?
Only if sewn very firmly, and only for supervised wear. For young children, use a crochet circle or embroidery instead.
Can I wash them?
Yes, in cool water, then reshape and dry flat.
Thank You
We hope you enjoy making these little clogs. When you finish a pair, share a photo in the comments. We love seeing your colour choices, and if anything felt confusing, tell us so we can improve the pattern for the next beginner.
—SEO—
Meta title: Free Crochet Baby Clogs Pattern for Beginners
Meta description: Make cute crochet baby clogs with side holes, a heel strap and a button. Free step-by-step pattern with every round counted, perfect for beginners.
Slug: free-crochet-baby-clogs-pattern
Focus keyword: crochet baby clogs pattern
Tags: crochet baby clogs, baby booties pattern, free crochet pattern, beginner crochet, baby shoes