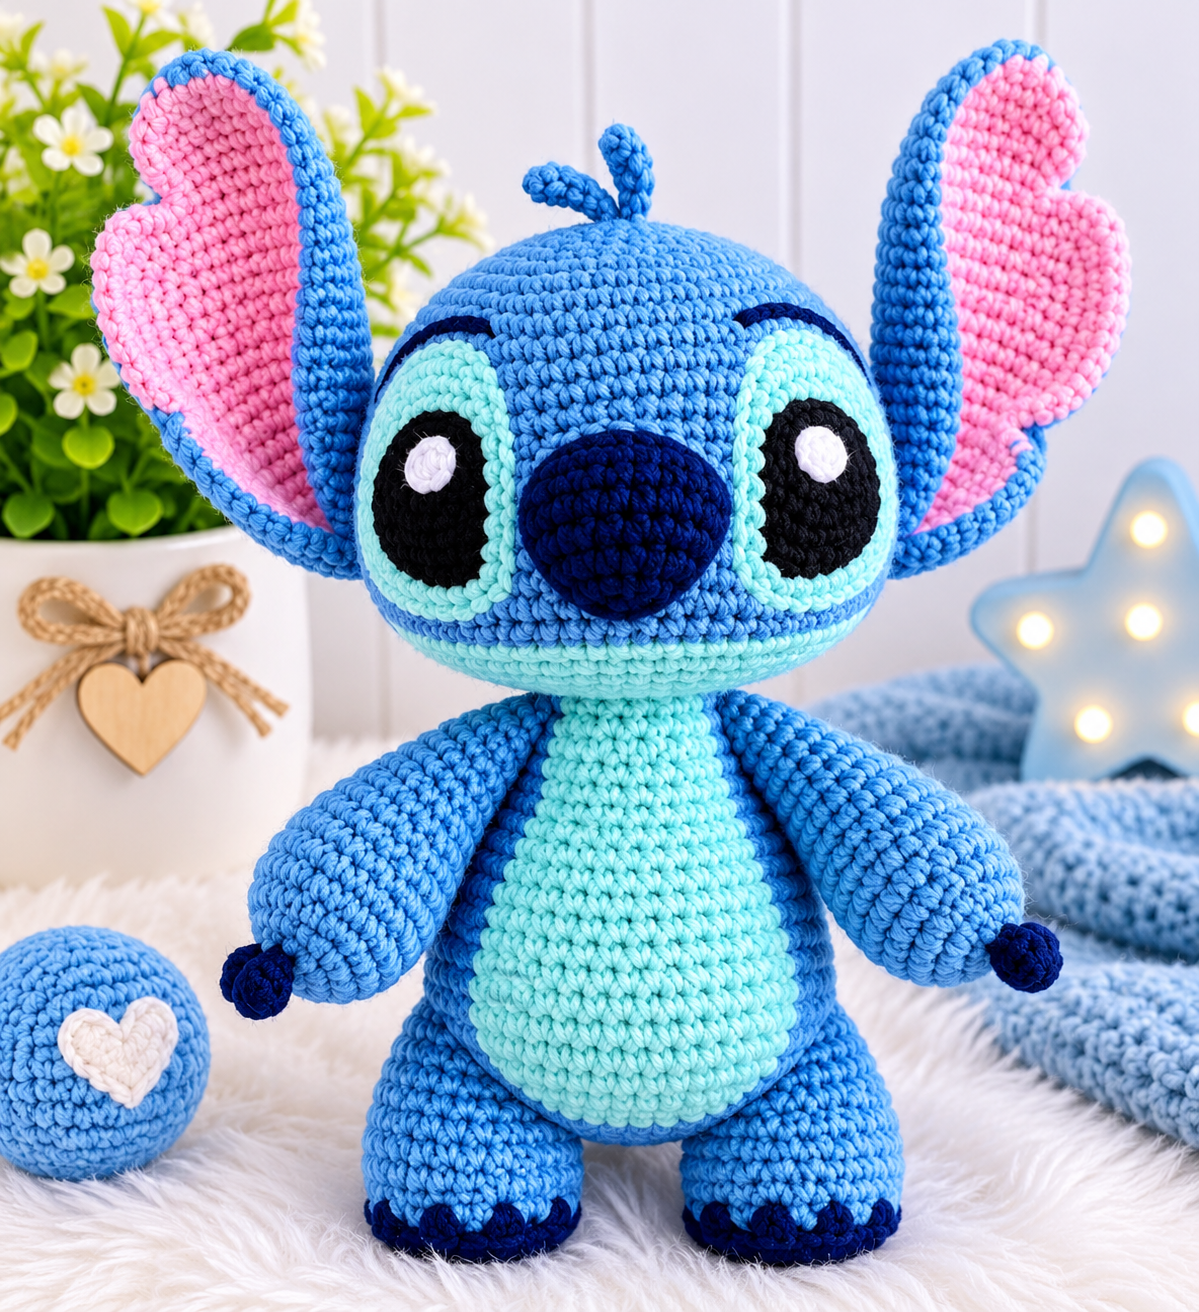
This little blue alien has a round head, big pointed ears with pink insides, and a pale mint belly. It is inspired by a much-loved cartoon character and made from simple shapes. This pattern is for your own enjoyment and for gifts, not for selling.
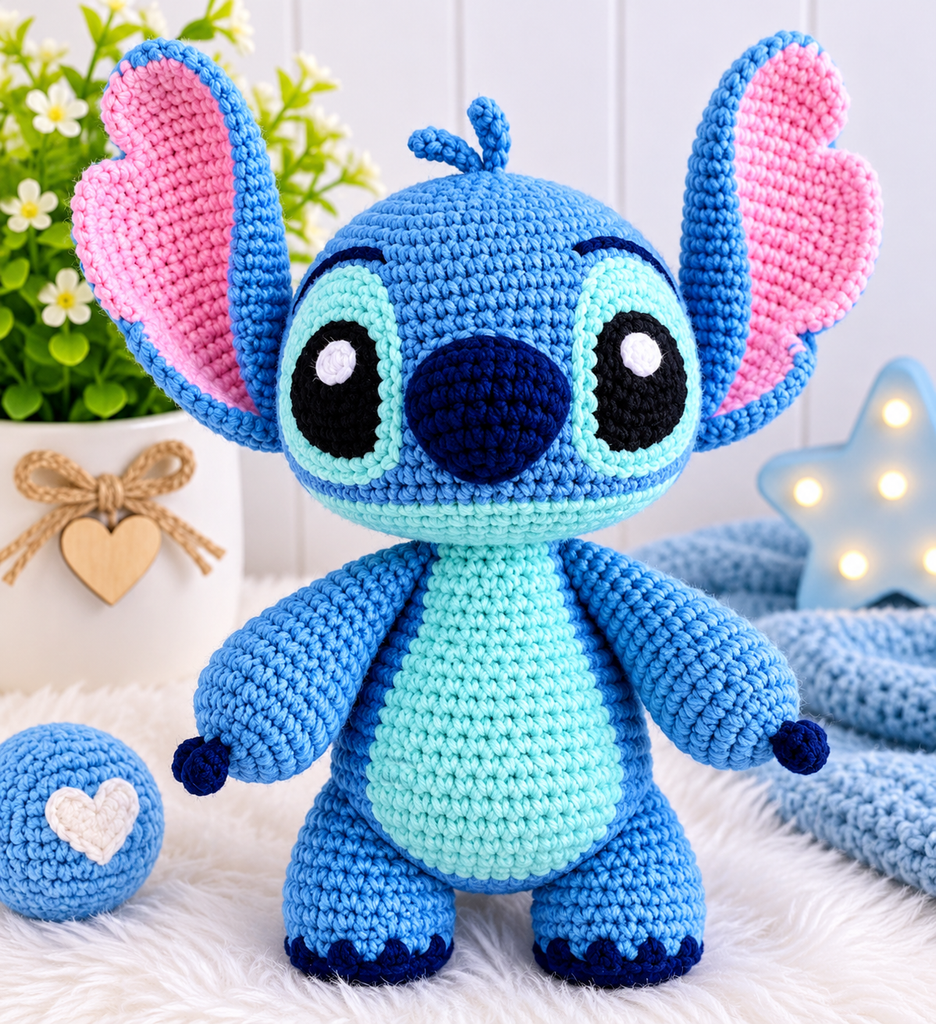
We kept the shaping as friendly as we could. Everything is made from balls, tubes and flat circles, and each piece is written round by round with a stitch count. If you can make a magic ring, a single crochet and an increase, you can make this little guy.
Finished size: about 18 cm (7 in) tall, not counting the ears
Skill level: Advanced beginner (several pieces to sew together)
Time: about 6 to 8 hours
Materials
- DK or light worsted cotton yarn:
- Blue: about 55 g (roughly 140 m / 150 yd)
- Mint or pale aqua: about 8 g
- Pink: about 4 g
- Navy: about 5 g
- A little white yarn for the eye highlights
- 3 mm crochet hook
- 2 black safety eyes, 8 mm
- Polyester stuffing
- Stitch marker, yarn needle, scissors, pins
Smooth cotton keeps the shapes crisp. Our guide to Best Yarn for Amigurumi explains why. If you are missing any tools, see The Only Amigurumi Tools You Need.
Safety note: For babies and young children, skip the safety eyes and embroider the eyes with black yarn instead. Use black satin stitches in a small oval, with a tiny white stitch for the highlight.
Abbreviations (US terms)
- MR: magic ring
- ch: chain
- sc: single crochet
- inc: increase, which means 2 sc in the same stitch
- dec: invisible decrease. Insert your hook into the front loop only of the next stitch, then the front loop of the stitch after it. Yarn over and pull through both loops, then yarn over and pull through all 3 loops on the hook.
- BLO: back loop only. Work into the back (far) loop of the “V” on top of each stitch.
- sl st: slip stitch
- st / sts: stitch / stitches
- Rnd: round
- ( ) x 3: repeat the bit in brackets 3 times
New to reading patterns? Try How to Read an Amigurumi Pattern. The Single Crochet, Increases and Decreases guide covers the invisible decrease.
Before You Start
- Work in a spiral. Do not join your rounds or turn your work. Put a stitch marker in the first stitch of each round and move it up as you go.
- Count every round. The number at the end of each line is how many stitches you should have. Fix a wrong count right away.
- Start every piece with a magic ring. It leaves no hole in the middle.
- Stuff firmly. Cotton stretches a little, so firm stuffing keeps the shapes round.
- Pin before you sew. Compare both sides from the front and the back before you stitch anything down.
The Pattern
Head (blue)
- Rnd 1: 6 sc in MR (6)
- Rnd 2: inc x 6 (12)
- Rnd 3: (sc, inc) x 6 (18)
- Rnd 4: (2 sc, inc) x 6 (24)
- Rnd 5: (3 sc, inc) x 6 (30)
- Rnd 6: (4 sc, inc) x 6 (36)
- Rnd 7: (5 sc, inc) x 6 (42)
- Rnd 8: (6 sc, inc) x 6 (48)
- Rnds 9 to 15: sc in each st around (48)
Eyes: Before you go any further, make the eye patches and nose (see below). Push the post of each safety eye through the middle of a mint patch, then through the head between Rnds 11 and 12. Place the eyes 8 sts apart, with the centre of the face between them. Fix the washers on the inside, then sew each patch to the head.
- Rnd 16: (6 sc, dec) x 6 (42)
- Rnd 17: (5 sc, dec) x 6 (36)
- Rnd 18: (4 sc, dec) x 6 (30)
- Rnd 19: (3 sc, dec) x 6 (24)
- Rnd 20: (2 sc, dec) x 6 (18)
Stuff the head firmly now, and add a bit more as you go.
- Rnd 21: (sc, dec) x 6 (12)
- Rnd 22: dec x 6 (6)
Fasten off, then weave the end through the front loops of the last 6 sts and pull tight. Hide the end inside.
Eye Patches (make 2, mint)
- Rnd 1: 6 sc in MR (6)
- Rnd 2: inc x 6 (12)
- Rnd 3: sc in each st around (12)
Sl st in the next st, fasten off, and leave a long tail for sewing.
Nose (navy)
- Rnd 1: 6 sc in MR (6)
- Rnd 2: inc x 6 (12)
- Rnd 3: sc in each st around (12)
Sl st in the next st, fasten off, and leave a long tail for sewing.
Ears (make 2, blue)
- Rnd 1: 6 sc in MR (6)
- Rnd 2: (sc, inc) x 3 (9)
- Rnd 3: (2 sc, inc) x 3 (12)
- Rnd 4: (3 sc, inc) x 3 (15)
- Rnd 5: (4 sc, inc) x 3 (18)
- Rnds 6 to 10: sc in each st around (18)
- Rnd 11: (4 sc, dec) x 3 (15)
- Rnds 12 to 13: sc in each st around (15)
Do not stuff. Fasten off and leave a long tail for sewing.
Inner Ears (make 2, pink)
- Rnd 1: 6 sc in MR (6)
- Rnd 2: (sc, inc) x 3 (9)
- Rnd 3: (2 sc, inc) x 3 (12)
- Rnds 4 to 10: sc in each st around (12)
Do not stuff. Fasten off and leave a long tail for sewing.
Body (blue)
- Rnd 1: 6 sc in MR (6)
- Rnd 2: inc x 6 (12)
- Rnd 3: (sc, inc) x 6 (18)
- Rnd 4: (2 sc, inc) x 6 (24)
- Rnd 5: (3 sc, inc) x 6 (30)
- Rnd 6: (4 sc, inc) x 6 (36)
- Rnds 7 to 12: sc in each st around (36)
- Rnd 13: (4 sc, dec) x 6 (30)
- Rnd 14: (3 sc, dec) x 6 (24)
- Rnds 15 to 16: sc in each st around (24)
- Rnd 17: (2 sc, dec) x 6 (18)
Stuff the body firmly. Fasten off, leave a long tail, and keep the top open for sewing to the head.
Belly Patch (mint)
This is a flat oval. Chain 7.
- Rnd 1: 2 sc in the 2nd ch from the hook, sc in the next 4 ch, 3 sc in the last ch. Turn to the other side of the chain and sc in the free loops of the next 4 ch, then sc in the last free loop (14)
- Rnd 2: inc in each of the next 3 sts, sc in next 4, inc in each of the next 3 sts, sc in next 4 (20)
- Rnd 3: (sc, inc) x 3, sc in next 4, (sc, inc) x 3, sc in next 4 (26)
Sl st in the next st, fasten off, and leave a long tail for sewing.
A note on the design: Chain 7 means a chain of 7 stitches, counting the loop on your hook as none. The free loops are the loops on the other side of the chain. We cannot see the back of the toy in the photo, so the oval belly and the open top of the body are our own beginner-friendly design choices.
Arms (make 2, navy then blue)
- Rnd 1: 6 sc in MR, navy (6)
- Rnd 2: (sc, inc) x 3 (9)
- Rnd 3: sc in each st around (9). On the last st, change to blue (work it until 2 loops are left on the hook, then pull the blue through).
- Rnds 4 to 6: sc in each st around (9)
- Rnd 7: (2 sc, inc) x 3 (12)
- Rnds 8 to 11: sc in each st around (12)
Stuff lightly with the last bit of stuffing. Fasten off and leave a long tail. Flatten the top edge.
Legs (make 2, navy then blue)
- Rnd 1: 6 sc in MR, navy (6)
- Rnd 2: inc x 6 (12)
- Rnd 3: sc in the back loop of each st around (12). This makes a little edge around the sole.
- Rnd 4: sc in each st around (12). On the last st, change to blue.
- Rnds 5 to 9: sc in each st around (12)
Stuff firmly. Fasten off and leave a long tail.
Head Tufts (make 3, blue)
Chain 5. This means making 5 loops in a row. The loop on your hook does not count.
- Row 1: sc in the 2nd ch from the hook and in each ch across (4)
Fasten off and leave a long tail for sewing.
Putting It Together
- Sew the nose. Pin the nose in the centre of the face, between the eyes, over Rnds 13 to 15. Flatten it slightly into an oval and sew it down.
- Make the ears. Flatten the pink inner ear and pin it on the front of the blue ear, with its base matching the ear’s base. Sew around it, leaving a blue border all around.
- Sew the ears to the head. Flatten the base of each ear and sew it to the upper side of the head, over Rnds 5 to 9. Each ear should sit a quarter of the way around the head from the middle of the face (12 sts). Angle them slightly outward.
- Sew on the tufts. Sew the 3 tufts side by side on the top of the head, near Rnds 1 and 2, and let the tips curl.
- Sew on the belly patch. Pin the belly patch on the front of the body between Rnds 6 and 16, then sew it down.
- Sew the head to the body. Pin the open top of the body to the underside of the head, with the face pointing the same way as the belly. Sew all the way around, adding a little more stuffing if it feels loose.
- Sew on the arms. Pin each arm to the side of the body over Rnds 12 to 14, with the navy tip pointing out and slightly down. They sit a quarter of the way round (9 sts from the middle of the belly). Compare both sides before you sew.
- Sew on the legs. Sew the open top of each leg to the bottom of the body, side by side, with the navy ends facing forward. They may touch in the middle, and that is fine.
Finishing Touches
- Eyebrows: With navy yarn, embroider a short straight line above each eye, tilted slightly down towards the nose.
- Eye highlights: With white yarn, make 2 small stitches on the upper inner part of each eye, close together.
- Weave in all ends. Pull each tail inside the body and snip it.
- Shape him. Squeeze the head and body gently and tilt the ears a little to give him some attitude.
Make It Your Own
- A different colour: Try soft purple with pink, or a bright orange with cream, for a whole new character.
- A mini version: Use a 2.5 mm hook and thinner cotton for a palm-sized toy. Everything works the same way, just smaller.
- A bigger version: Use chunky yarn and a 5 mm hook for a soft cuddly toy, but use embroidered eyes if it is for a young child.
- Add a keyring: Sew a small loop to the top of the head to turn him into a bag charm.
Common Problems (and Quick Fixes)
- The head is lopsided. Check that every round has the right count, especially Rnds 8 to 15. A missed increase on one side makes the shape lean.
- The ears flop. Add a few sts of sewing around the base so each ear stands up. A tiny bit of stuffing at the base will help too.
- The eyes look uneven. Count the stitches between them before you attach the washers. Eight stitches apart, on the same round, is the key.
- He will not sit up. Check that the body is stuffed firmly and the legs are sewn on flat. For extra stability, add a little more stuffing in the legs.
If something else goes wrong, see 10 Beginner Amigurumi Mistakes.
FAQ
Can I make this without safety eyes?
Yes. Embroider the eyes with black yarn using satin stitch. This is the safest choice for babies and young children.
What if my pieces turn out bigger or smaller than yours?
That is just your tension. Keep all pieces in the same yarn and hook size so they match.
Do I need to stuff the ears?
No. Flat ears look best and are easier to sew on.
Why use the back loop on the leg?
It makes a little edge around the sole, so the legs sit neatly and the toy stands better.
Can I use a different yarn weight?
Yes, but use a hook that makes tight stitches so the stuffing does not show through.
Share Your Make
We would love to see your little blue alien. Share a photo in the comments and tell us which colours you chose. If you liked this one, try our Free Mini Whale Pattern next.
—SEO—
Meta title: Free Little Blue Alien Amigurumi Pattern for Beginners
Meta description: Make a cute blue alien amigurumi with big ears, a mint belly and a tiny tuft. Free step-by-step crochet pattern with every round counted.
Slug: free-blue-alien-amigurumi-pattern
Focus keyword: blue alien amigurumi pattern
Tags: amigurumi alien, free crochet pattern, beginner amigurumi, crochet toy, cartoon crochet